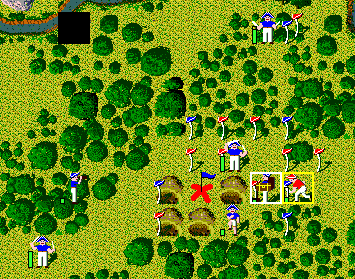

This is a cropped screen grab of the area around the middle treasure marker site, showing that 4 holes were dug before one of the NAV Trappers found the treasure chest. Each sword sticking in the ground with a hat sitting on top indicates the place where a team member was captured . A red hat on a sword indicates where a pirate was captured, and a blue hat means that a member of your NAV team was captured at that spot. There were 7 PIRATES captured in this battle to this point in the expedition, and 6 NAVS.
This battle started out with a lot of fights before the digging even began, and then the pirates attacked the diggers. Then, when a NAV found the treasure, it was promptly captured by a pirate, then captured back. A PIRATE Swordsman had just run up and was preparing to attack the NAV with the treasure when I hit the pause key preparatory to doing this screen grab. Note that if the PIRATE is successful in capturing the treasure I have a swordsman and a runner with good combat strength in adjacent squares ready to try and capture it back. I would then give it to the Runner to run into the woods and hide while I organize some team mates to escort the treasure carrier back to the NAV ship.
Note that there is a small bar immediately to the left of each player. The height of this bar gives a quick indication of the players COMBAT STRENGTH. The height of the green color in the bar is the amount of combat strength that the player has left at this time, with the whole bar being solid green when he is at full strength, and with no green when he is exhausted. This is very helpful to decide which pirate to attack, and which player to use.
To see the pop-up screen that appears when your NAV actually found the treasure, CLICK HERE.